Introduction
Automating deployment process plays a big role in your development. In this post I will show you how to launch an EC2 (Elastic Compute Cloud) instance on Amazon Web Services, setup a systemd service for out Spring Boot application and automate deployment procces with GitLab.
Spring Boot RESTful Web Service
I’ve already created a simple Spring Boot application with a couple of endpoints (shown bellow). The app has 2 entities: Console and Game, where each Console has multiple Games, and one Game is only for one Console. I’m using H2 in-memory databse, but that can easily be sustituted by any other database management system.

In the application.yml file, I’ve configured a server port to 8081. this is important to know for later.
application.yml
server.port: 8081

spring:
    application.name: spring-aws-gitlab
    output.ansi.enabled: always
    datasource:
        url: jdbc:h2:mem:testdb
        driver-class-name: org.h2.Driver
        username: sa
        password: password
    h2.console:
        enabled: true
        path: /h2
Amazon Web Services
Launcing an EC2 instance
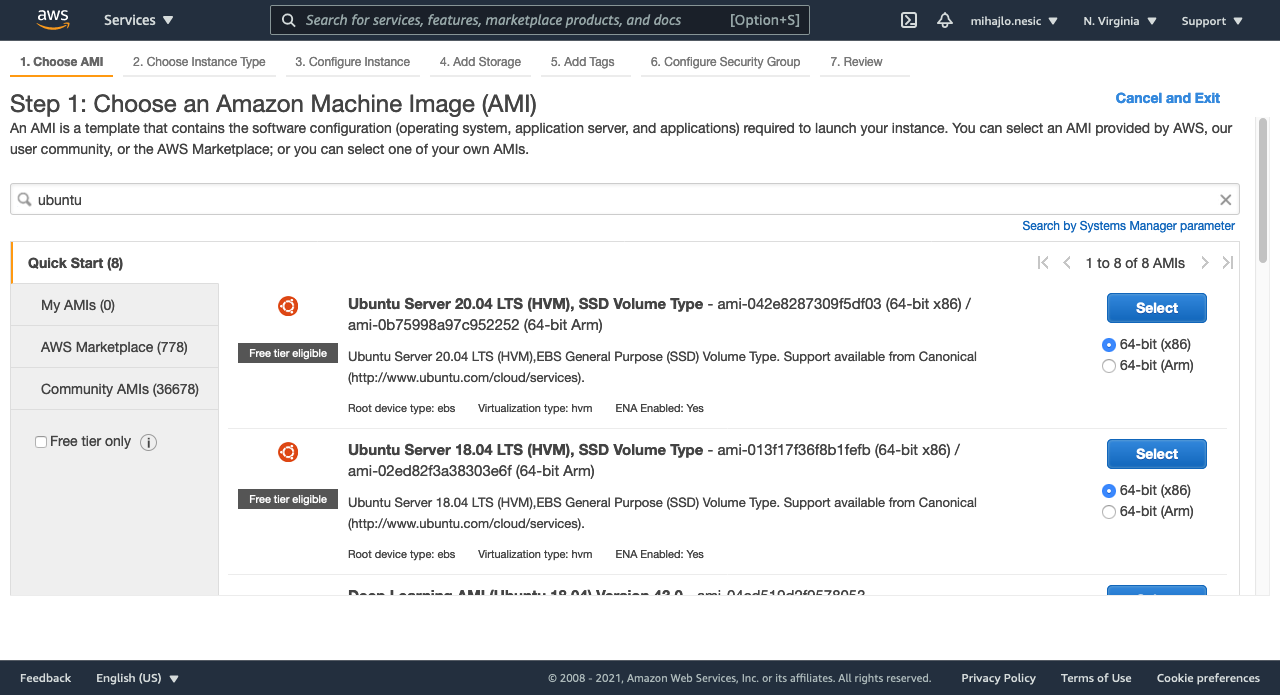
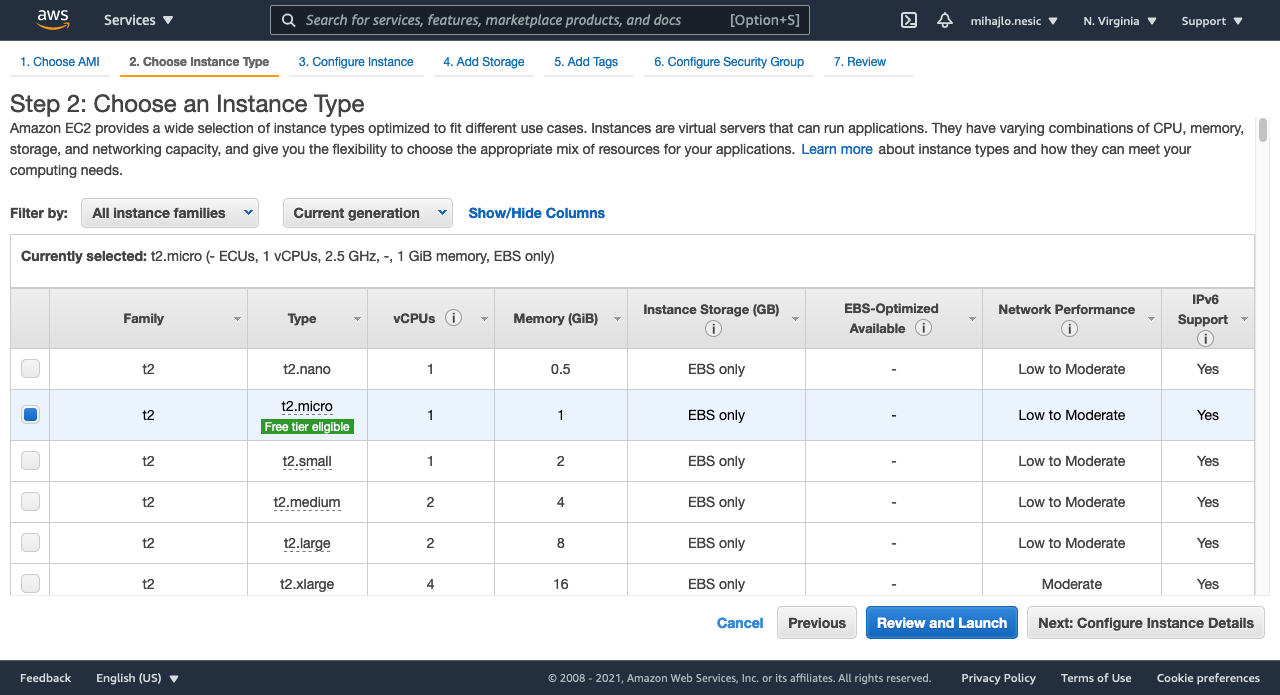
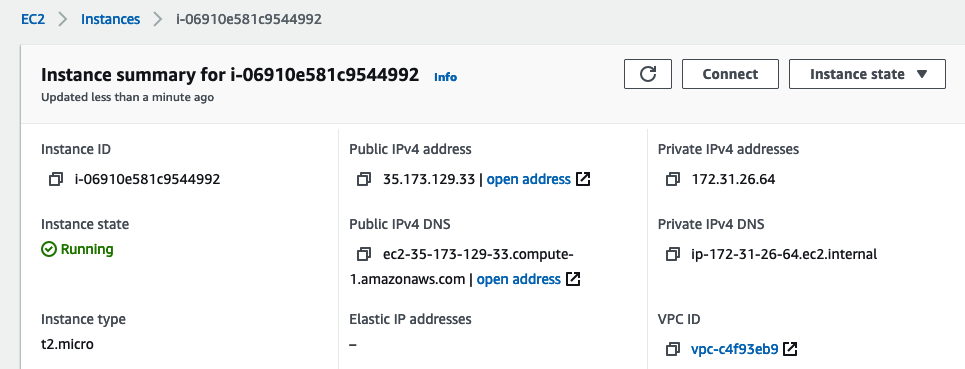
Launcing an EC2 instance is really easy. I will be creating a t2.micro instance with 8 GiB of storage running Ubuntu 18.04. Here are the steps to follow.
Step 1: Choose Ubuntu Server 18.04 LTS. You can really choose what ever you want here.
Step 2: Choose the t2.micro instance type. It is eligible for free tier of AWS so it is great for learning and testing purposes.
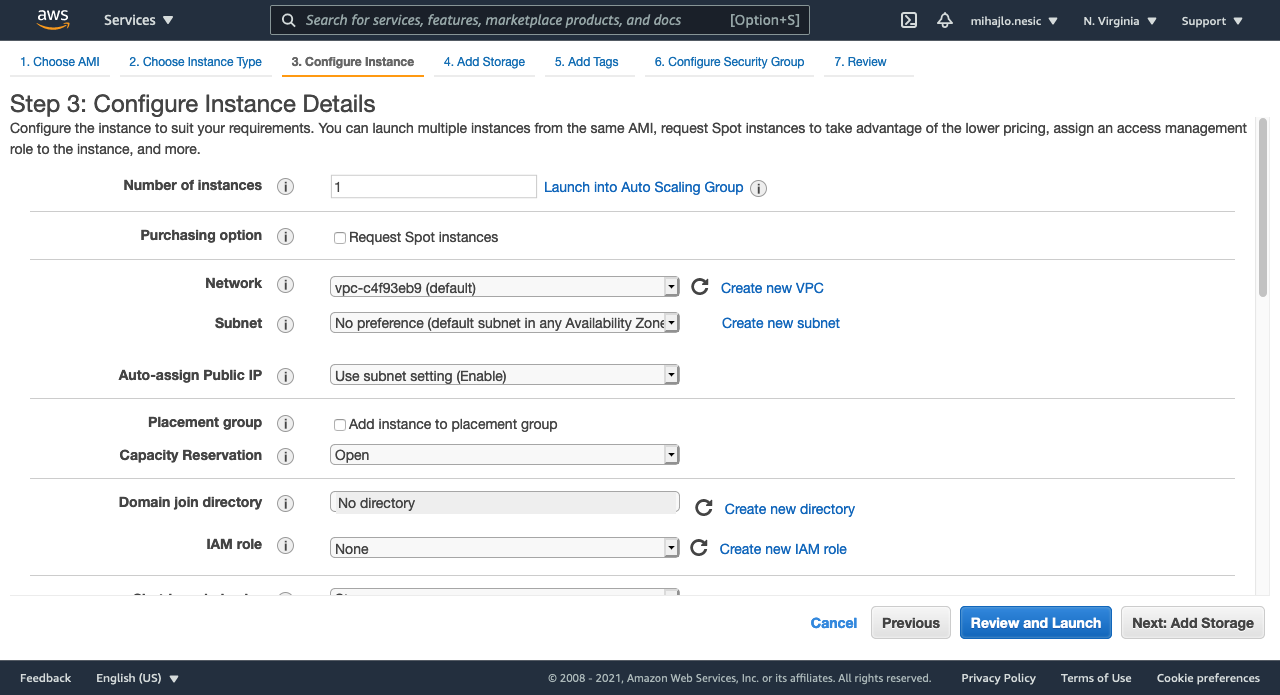
Step 3: I will be leaving everything as default.
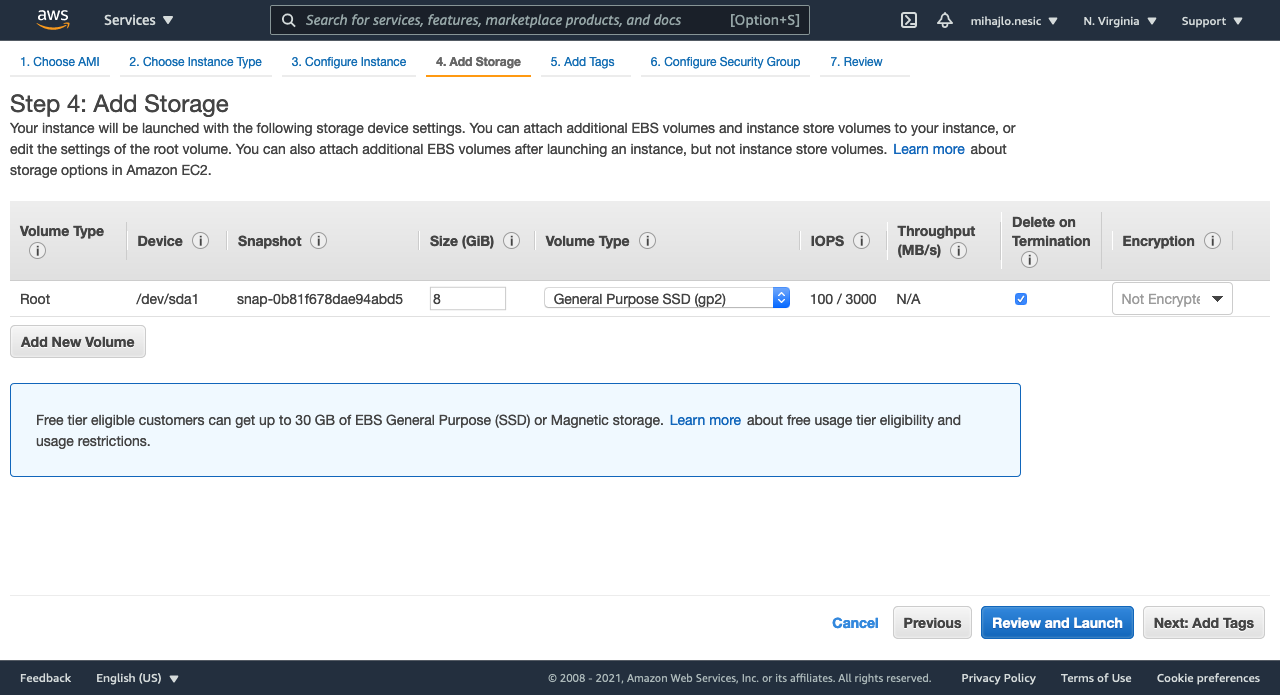
Step 4: I will choose 8 GiB of storage, which is default value.
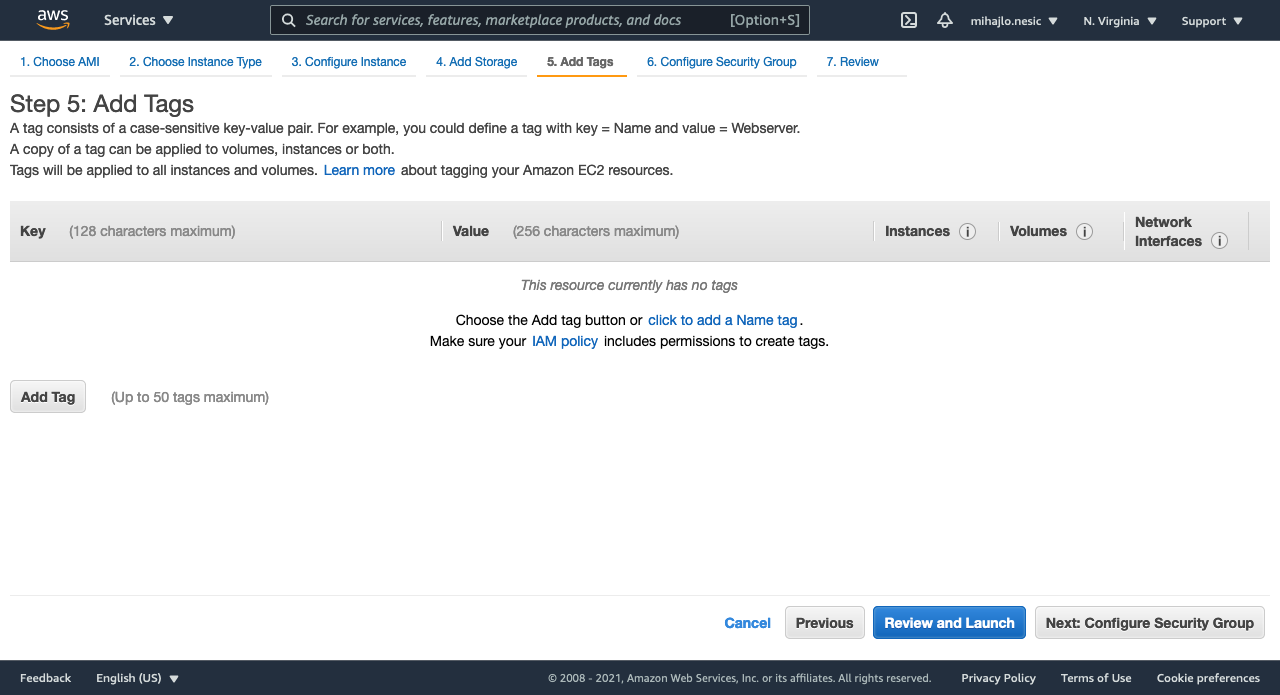
Step 5: I will not be adding any tags. You can skip that as well.
Step 6: The most important step. In short, you define what IP addresses can access an instance on which port. In my example I configured that anyone can SSH into the instance. This is not recommended (see the AWS message). You should really setup the security based on your need and use case. This setup is only for demonstration purposes.
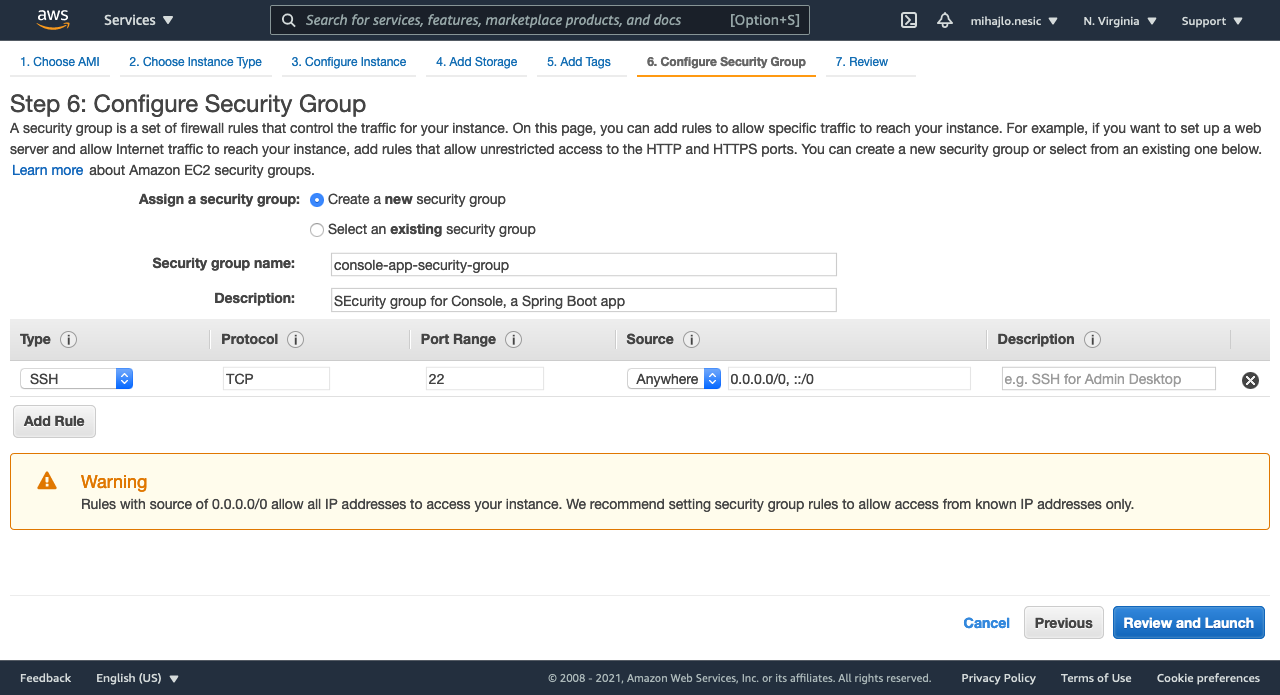
Sice our app will be running on port 8081, we will add an inbout rule with type Custom TCP on port 8081 to Anywhere. This way, our app can be accessed from any IP. Be careful how you setup the security for you applications. Never use the Anywhere source.

Finally, we get an option to generate a key for our instance. With this key, we will be able to use SSH. Be sure to download the key and store it somewhere safe. You will not be able to download it again.
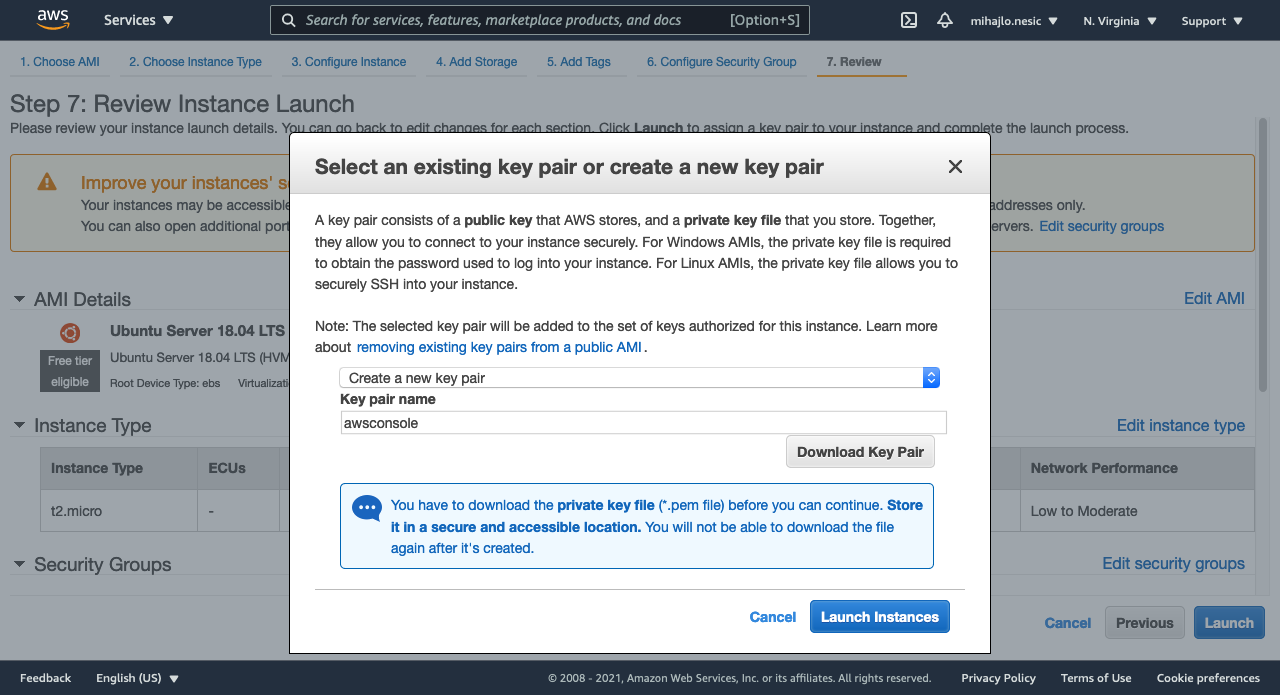
And you are done. The instance should start automatically.
SSH
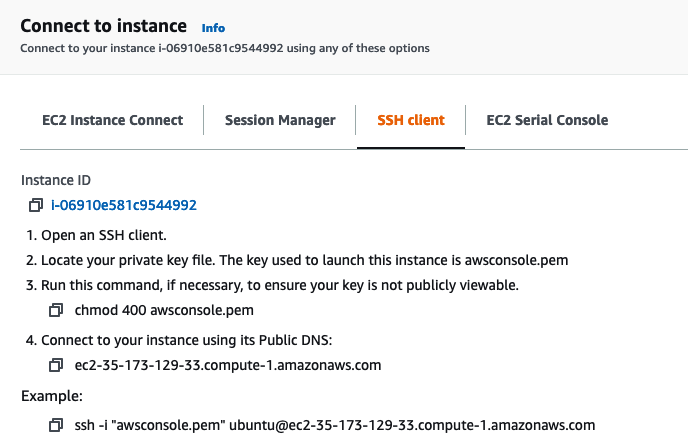
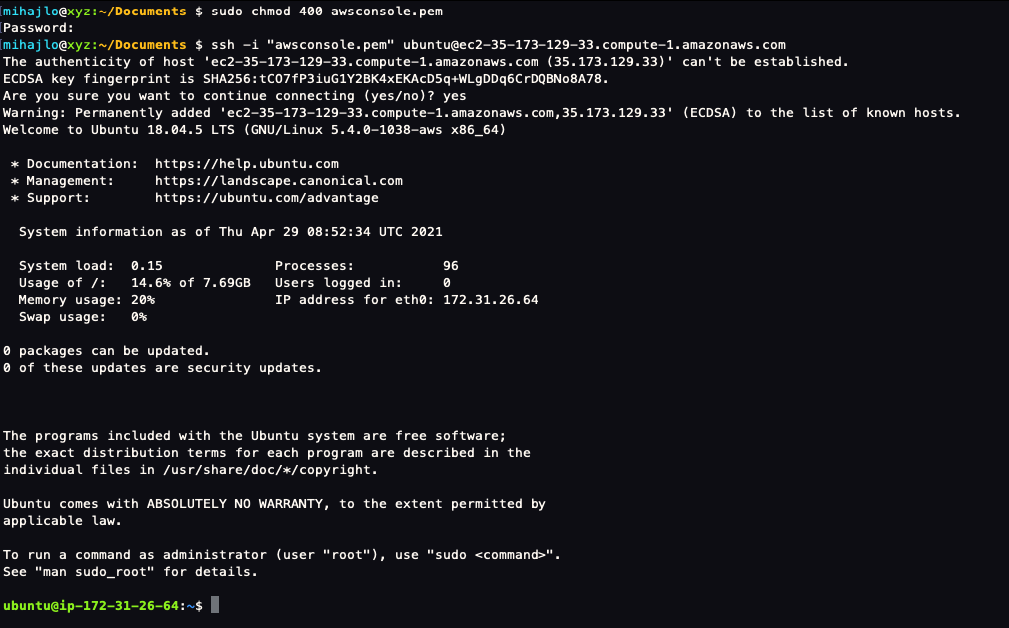
Once our instance is running, we can connect to it. I will be using the terminal but you can use PuTTY as well. Locate where you’ve downloaded and stored the key from AWS. In the instance page click Connect and follow the steps listed under SSH
Installing JDK
Since we will be running a Java Spring Boot application, we need to install Java. I will be using JDK 8.

systemd service
I will be running the application as a service on my Linux instance. In order to do this, I first need to know where my .jar file will be located and what will the file be named.
In the pom.xml file, I’ve defined the generated jar name
pom.xml (part)
...
<build>
    <finalName>consoleapp</finalName>
...
Next, I will create a directory called console-app in my home directory
The purpose of this direcory is to serve a jar file. This file will be pointed in our .service file.
consoleapp.service
[Unit]
Description=REST Service
After=syslog.target

[Service]
User=ubuntu
ExecStart=/usr/bin/java -jar /home/ubuntu/console-app/consoleapp.jar
SuccessExitStatus=143

[Install]
WantedBy=multi-user.target
After you’ve created the service file, copy it to the appropriate location.
Next, you need to reload systemd manager configuration with a following command.
Optionally, if you want your service to run at boot (the Spring Boot app will start when the instance turns on), tun the following command:
GitLab Ci/CD
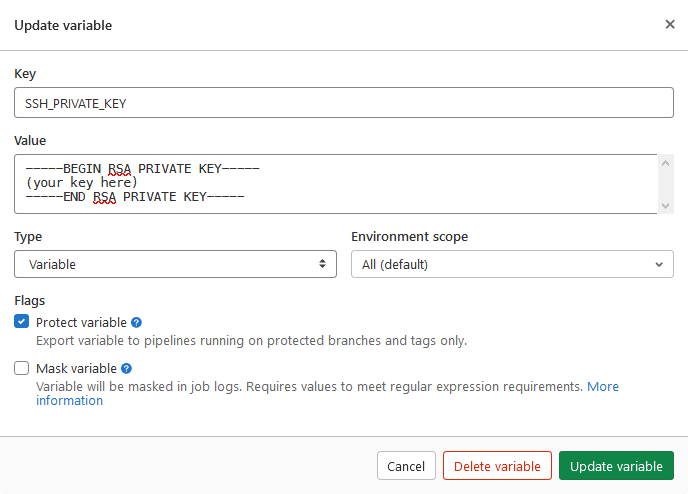
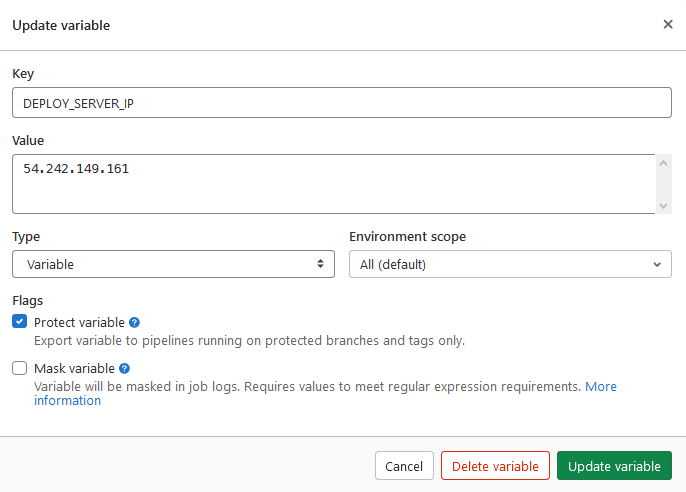
If you haven’t already, push your Spring Boot app to a GitLab repository. Next, navigate to Settings -> CI/CD -> Variables. You will need to define two variables: SSH_PRIVATE_KEY will be the contents for the .pem key file downloaded from AWS; and DEPLOY_SERVER_IP which is a public IPv4 address of your running EC2 instance.
Note: The variables can be called how ever you like, but must be changed accordingly in .gitlab-ci.yml file.
.gitlab-ci.yml script
It is time to create a .gitlab-ci.yml file that will instruct a GitLab runner how to build and deploy our app. The pipeline consists of two stages: build and deploy.
The build stage is using Docker executor with image maven:3.6.1-jdk-8-slim to run a command mvn clean install to create a jer file. The artifact is saved under target directory and will last for 1 week. Also, this job will run only on master branch.
The deploy stage is stopping the consoleapp service, copying the generated jar file from previous job to the console-app directory and then starting the service. Before that, the script runs the agent in background and adds the SSH key. Also, it adds the server’s public IP address to a list of known hosts.
.gitlab-ci.yml
stages:
    - build
    - deploy

build:
    stage: build
    image:  maven:3.6.1-jdk-8-slim
    script:
        - echo "Building app..."
        - mvn clean install
        - echo "Finished building the app."
    artifacts:
        expire_in: 1 week
        paths:
            - target/consoleapp.jar
    only:
        - master

deploy:
    stage: deploy
    image: alpine:3.11
    before_script:
        - apk update && apk add openssh-client bash
        - mkdir -p ~/.ssh
        - eval $(ssh-agent -s)
        - echo "$SSH_PRIVATE_KEY" | tr -d '\r' | ssh-add - > /dev/null
        - touch ~/.ssh/config
        - echo -e "Host *\n\tStrictHostKeyChecking no\n\n" > ~/.ssh/config
        - ssh-keyscan -H $DEPLOY_SERVER_IP >> ~/.ssh/known_hosts
    script:
        - echo "Deploying started..."
        - ssh ubuntu@$DEPLOY_SERVER_IP "sudo systemctl stop consoleapp.service"
        - scp ./target/consoleapp.jar ubuntu@$DEPLOY_SERVER_IP:~/console-app/
        - ssh ubuntu@$DEPLOY_SERVER_IP "sudo systemctl start consoleapp.service"
        - echo "Finished deploying the app."
    only:
        - master
Result
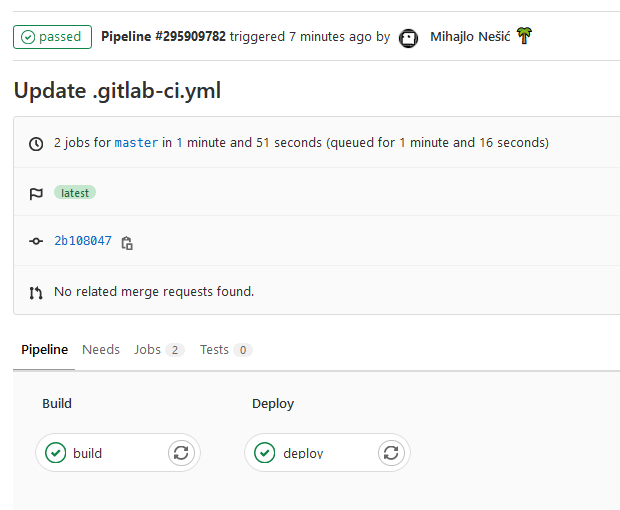
You can inspect and follow the pipeline as it is running.
Navigate to the public IP and hit any endpoint.
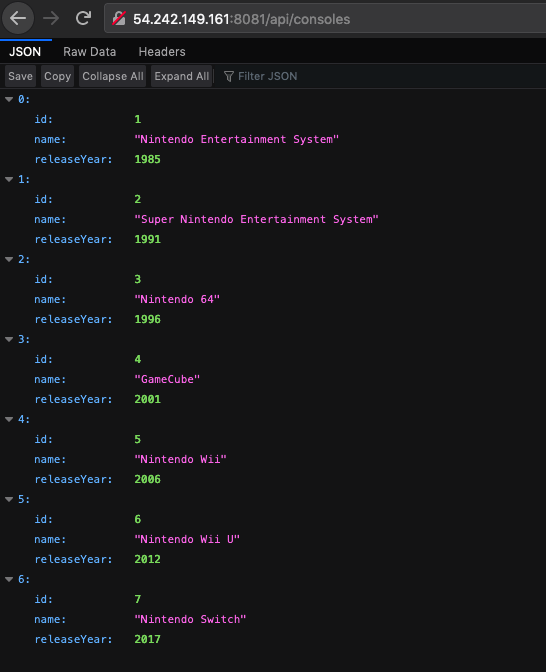
Congratulations, you have successfully deployed a Spring Boot appliication to EC2 with GitLab :)
You can check the consoleapp service by running:

Source code
Source code can be found on GitLab
Conclusion
GitLab provides one of the best tools for complete development lifecycle. In combination with AWS, the whole deployment process can be easily automated in just minutes!
The most important thing to remember is to setup the security rules well. One of the examples is to allow the backend port to be accessed only by the frontend IP address.
Comments