Introduction
RubyMine 2020.2 is in early access program. They are adding Liquid tempalte language support and Jekyll is in plan. Some thing in the future may change or may be simplified. Until then, this should be a good tutorial to follow for developing Jekyll websites in RubyMine 2020.1.
Note: I will be using RubyMine 2020.2 EAP in this tutorial, because of the Liquid support.
I’ll start by cloning this Jekyll website from GitLab and opening it in RubyMine.

Run configuration
The most important thing is running our Jekyll website. There are couple of ways to do this. The easiest way is to create a Gem Command and specify Gem name, Executable name and Arguments. See screenshots bellow.
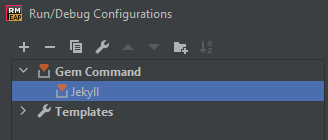
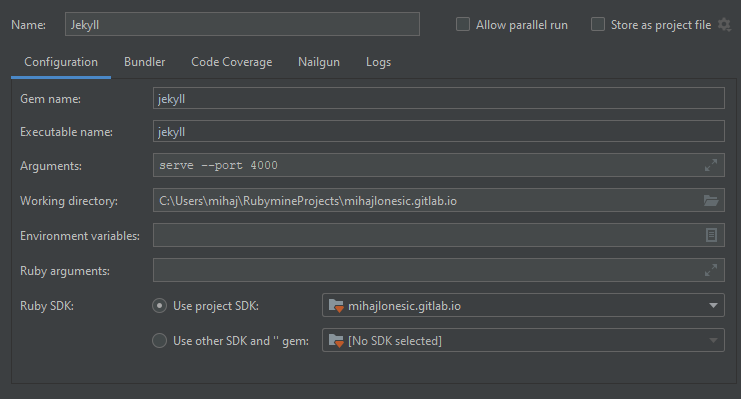
If you are using bundler, you can specify to run the script in context of the bundle with bundle exec.
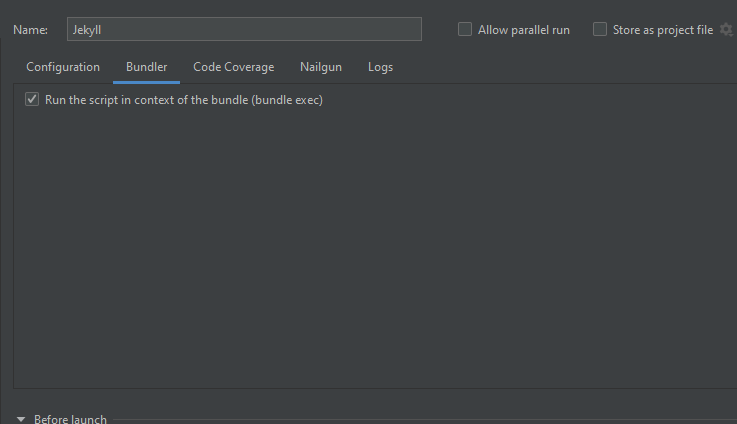
Then just run by clicking the Run button in the upper right corner.


File template
Another cool feature of RubyMine (and other JetBrains’ IDEs) is creating file templates. We’ll be creating a file template for Jekyll blog posts.
Start by navigating to File -> Editor -> File and Code templates. Create a new template and name it Jekyll post. Next, paste the template from snippet bellow.
Jekyll post file template
---
layout: post
title: "$Title"
summary: "$Summary"
date: ${YEAR}-${MONTH}-${DAY} ${HOUR}:${MINUTE}:${SECOND}
comments: true
---
Note: It’s important to specify the file extension, which is md for markdown.
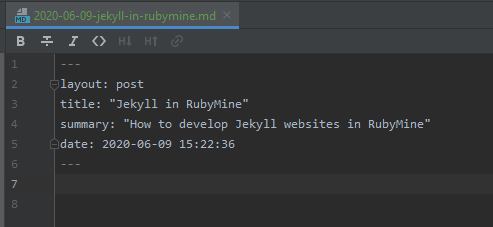
You can customize this tempalte to satisfy your needs. This tempalte will define a post title, summary and date of the post. Comments are enabled by default and the layout is post.
And that’s it! Jekyll blog psots can be created by right clicking on a _posts folder -> New -> Jekyll post.
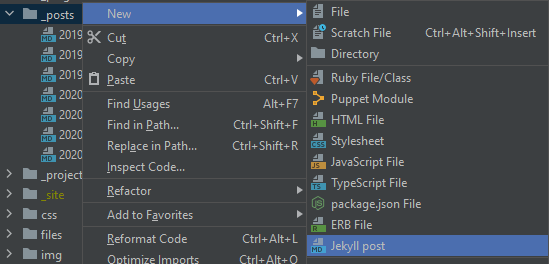
A window will open asking you for the post details.
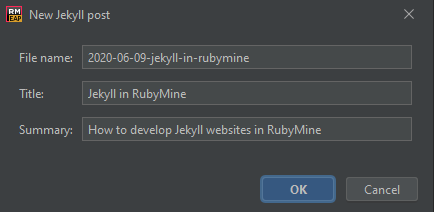
This is the generated file.
Conclusion
You can follow this issue on YouTrack for news on Jekyll support in RubyMine. Until then, this is a good guide to get you started. The rest is up to you! Start writing! :)
Comments